

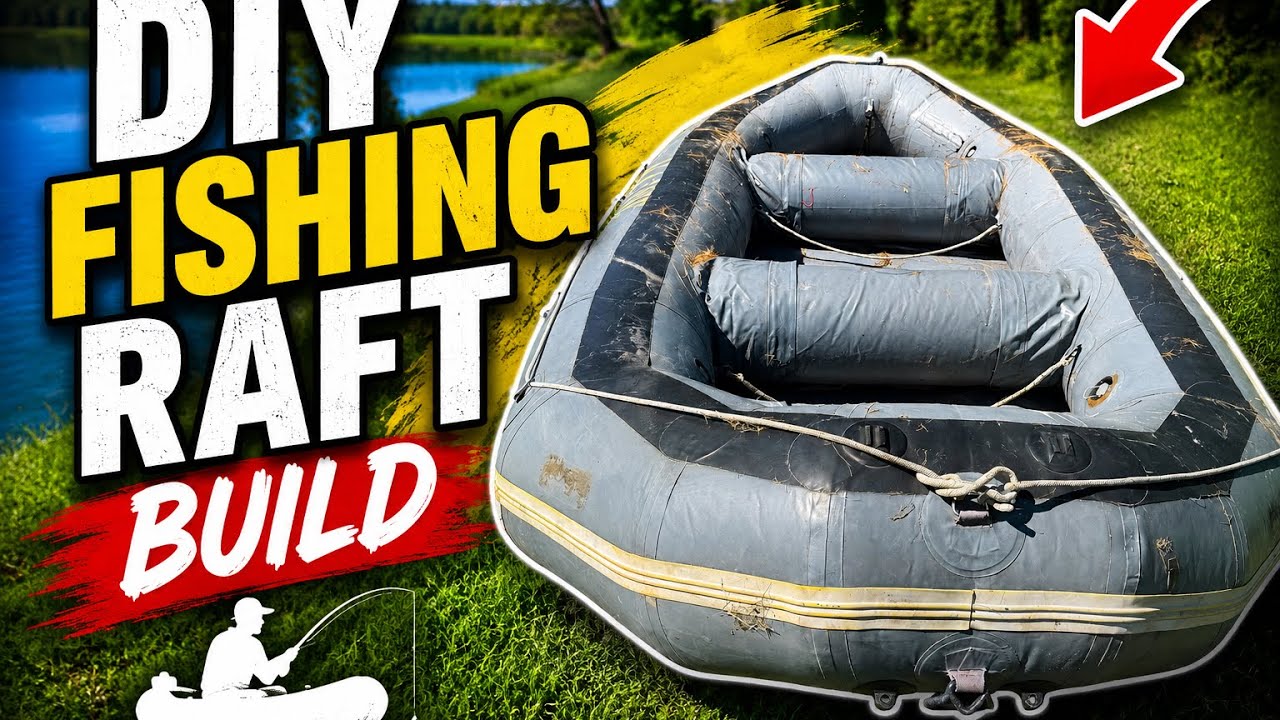
A proper DIY fishing raft repair is a skill every serious angler should have in their back pocket. Out here in the Maine woods, gear takes a beating. Instead of tossing that old inflatable that’s been sitting behind the shed, you can often bring it back to life with a little patience and the right materials, saving you a pile of cash for more important things… like bait and tackle.
Why an Inflatable Raft is Worth the Effort
There are some honey holes and heritage waters up here that you just can’t get to with a big boat and trailer. A small, tough inflatable opens up a world of possibilities, from quiet back coves on a lake to stretches of river that are perfect for a float. It’s the key to accessing incredible river float fishing for brookies and bass, and it’s just as useful for sneaking into quiet spots for some lake/pond fishing. A successful raft repair means you have a versatile tool ready to go.
The 5 Steps to a Bulletproof Raft Repair
Over the years, I’ve seen plenty of quick-and-dirty patches fail at the worst possible time. If you want your DIY fishing raft repair to last, you can’t cut corners. It’s not just about slapping some glue on a patch; it’s a process.
- 1. Surface Prep is Non-Negotiable: This is the critical mistake most people make. The area around the hole MUST be perfectly clean. Use a solvent like MEK to wipe away all the grime, oils, and sun-rotted residue. If you glue a patch to a dirty surface, you’re just gluing it to the dirt, not the raft.
- 2. Cut a Proper Patch: Always cut your patch bigger than the hole, and—this is important—round the corners. Sharp corners on a patch are weak points that will eventually get caught and start to peel up.
- 3. Use the Right Adhesive, Twice: Don’t cheap out on hardware store vinyl glue. Get a high-quality urethane adhesive made for inflatables. Apply a thin, even coat to both the patch and the raft. Let it get tacky, then apply a second thin coat. This creates the strongest possible bond.
- 4. Apply Firm, Even Pressure: Carefully place your patch and use a small roller or the back of a spoon to work from the center outwards. Your goal is to push out every single air bubble. An air bubble is a future failure point.
- 5. Hunt for Hidden Leaks: Once your main patch has cured, inflate the raft and spray it down with soapy water. Look for tiny bubbles forming along the old seams or in other worn spots. You’d be surprised how many tiny pinhole leaks an old boat can have. Fix them now before you’re on the water.
Get on the Water with Confidence
Doing your own DIY fishing raft repair is satisfying work. It teaches you about your equipment and builds confidence in your gear. Before you head out, always double-check state regulations and safety requirements over at the Maine Dept of Inland Fisheries & Wildlife. Safety first, always.
Of course, if you’d rather spend your time with a line in the water than a tube of adhesive in your hand, we get that too. That’s what we’re here for.
Ready to put a raft to good use on some of Maine’s best remote waters? Book a guided river float fishing trip with us and let us handle the gear, the navigation, and finding the fish.
From the Field
More From Our Guides
 The Maine Shad Run: When It Happens and How to Fish ItRead the article →
 Ice Fishing in Maine: A Guide to the Hardwater SeasonRead the article →
 Maine Shad Fishing Gear: Rods, Line, Shad Darts and Where Fish HoldRead the article →
 The Unexpected Thrill of Landing a Winter Largemouth BassRead the article →